
Differences with version 1.0
- Perspective correction support.
- Dynamic lightening.
- Alpha
transparency.
- Mini OpenGL functions set to works with Triangles, Quads, and
Vertex Array.
- BSP and functions for 1st person camera games.
-
Landscape mode support.
- Performances increase:
-
More than 2 times more fast.
- 7 New tutorials showing :
- Alpha
transparency.
- Dynamic lights.
- Mesh
deformation.
- Use of mini OpenGL functions to draw triangles, quads,
and vertex array.
- How
to display a Quake like scene, define fixed lights, and use a 1st person
camera.
Differences with version 1.1
- Support new pocket pc screen, with auto detection
- Untextured mode and
wireframe mode.
- Performances increase:
- 10% to
15% more fast (versus 1.1).
- 100% of source code
- 2 New tutorials showing :
- Character
animation.
- Collisions detection.
PocketGL 1.2 specifications
Axis Description : Direct orient, same as OpenGL
Camera is centered on (0, 0, 0) and look to -z
All triangles must be
textured.
All vertex have a light intensity level.
Because renderer used fixed point calculation, following constraint have to be respected to avoid overflow:
Range of vertex coordinates range must be in [-23170..-23170]
Texture tile
max must be < TEX_TILE_MAX (defined to 32)
Perspective Correction:
Rasterization of faces using perspective correction is more slow than without. Perspective correction can be activated never, always, or auto. In automatic mode, renderer evaluate perspective disformation, and apply correction if required. The maximum allowed disformation can be defined by user.
Transparency:
There are 2 alpha modes:
Binary mode:
- A given color is defined as transparent
(ALPHA_KEY = black). This color is not drawn, and Z buffer is not
modified.
Alpha Mode:
- The final color will be the sum
between alpha texture color and screen background color. For optimization
reasons, the transparency ratio is fixed to 50%. So final color is always 50% of
backgroud color + 50% of texture color.
The renderer automatically z sort alpha faces and draw them at scene end for correct alpha rendering.
Mixed mode:
- It is a mix between Binary mode and Alpha
mode. Pixel with color different of ALPHA_KEY will be drawn in Alpha mode.
The rendering mode (Binary Alpha, Alpha, Mixed, Opaque) is a texture parameter.
Textures: - The actual code can import only uncompressed TGA files for textures.
- The texture can be 24 or 32 bits depth only.
- The texture X an Y size must be a 2^n multiple.
(exemple : 16*32, 32*64, 64*64 ... etc. max is 128*128), however, when using
ExportPGL program, if size is
not 2^n multiple, the texture is automatically resized to 2^n multiple.
- Texture coordinates are integer values
and define directly texture size.(ex 0..64). (On floating point systems, texture
coordinates are floats generaly between 0 to 1 (if not tiled)).
Rotations: Units for angles are not degree, or radian, but an integer value between 0 to ANGLE2PI (set to 2048).
Dynamic Lights:
Up to 16 dynamic lights can be defined. Each light can have 2 lightening
mode:
- Omni mode : light intensity will depend directly of mesh
faces orientations.
- Diffuse Mode : Smooth lightening mode.
Fog:
The fog color is always blacks.
There are 2 fog modes:
-
Linear fog: attenuation of mesh intensity depend of the distance.
- Z2
fog: attenuation of mesh intensity depend of the square of the distance.
The fog mode and depth can be defined by user.
MiniGL:
A set of OpenGL instructions allow to works with Triangles, Quads, or Vertex Arrays. The purpose of these functions is to allow learning 3d with OpenGL tutorials.
BSP: (binary space partition)
A bsp function allow to draw faster fixed objects of a scene.
The scene is cutted into blocks, when rendering, PocketGL check if a block is visible on screen. If yes, the block is Z sorted, a test is done to know if block is not hidden by another one (to avoid drawing hidden blocks). If block very near of camera, perspective correction is applyed.
The BSP cut parameters can be defined by user, depending of scene size.
Unzip the PocketGL.zip file in C:\PocketGL folder
The directory structure must be as follow, with demo version
some folders are missing

The Data
directory contain datas for tutorials, 3dsmax scenes, and requested
textures .
The
ExportPGL directory contain
sources and project workspace of ExportPGL program.
The GApi
directory contain standard gapi lib and dll for pocket pc games.
The Pc folder
directory contain renderer project workspace for PC (full version only).
The WinCe directory contain renderer project workspace for Pocket PC.
The Src
directory contain sources of library
and tutorials.
The demo programs can be compiled with Visual C++ 6 (Target = PC) and Embedded Visual C++ 3 (Target = Pocket PC).
Create on you pocket PC a '/PocketGL' directory on root.
Copy from directory 'Data' on the PC the requisted datas used by tutorials.
The requested files are : ( .p3d, .Tex, .Tga files, other not requested)
(tutorial 1)
Demo1.tga
(tutorial 2)
LemMerge.P3d
LemMerge.Tex
(tutorial 3-4)
Lem.P3d
Lem.Tex
(tutorial 5)
Solar.P3d
Solar.Tex
(tutorial 6)
Alpha.P3d
Alpha.Tex
(tutorial 7)
LightScene.P3d
LightScene.Tex
(tutorial 8)
Water.P3d
Water.Tex
(tutorial 9, textures for cube faces)
Fnt0.tga
Fnt1.tga
Fnt2.tga
Fnt3.tga
Fnt4.tga
Fnt5.tga
(tutorial 10, Quake3 map)
qMap2.P3d
qMap2.Tex
(tutorial 11, Half-Life Barney Character)
barney.mdl
(tutorial 12, Collisions)
Balls.P3d
Balls.Tex
Dlls
Copy gx.dll from /GApi/Mips or GApi/Arm.
(Make sure your folder option do not
hide dll files)
Then now you are ready to compile and test tutorials.
- Load the project file PocketGL.dsw in the
Pc folder with visual
C++6
- Set path to datas (see readme.txt file)
- Load the project file PocketGL.vcw in the WinCe
folder with embedded visual C++ 3
There Are 12 tutorials programs : Demo1 to Demo12. To activate a given demo, refer to readme.txt file.
On pocket PC, when program is compiled, copy it in the /PocketGL folder and run it directly with pocket PC.
Tutorial1

Draw only a quad containing 2 faces with a texture. Show how to init geometry with code, and activate perspective correction.
Tutorial2

Draw a lunar module defined as a single object. Show how to import data.
Tutorial3

Draw a lunar module defined as multiple objects. Show how to import multiple meshs. Show too, how to use transparency.
Tutorial4

Draw lunar module, show how to use texture animation, object scaling, and matrix stack. The module can be controled with up arrow key.
Tutorial5

Draw solar system.
Show how to:
- use matrix
stack to define relative moves.
- modify dynamically vertex color
intensity.
- Define a landscape mode
-Write directly in virtual screen (background stars).
Tutorial6

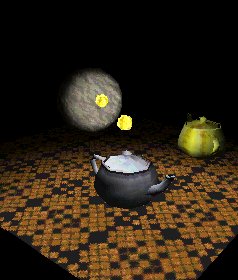
Draw stained glass with alpha transparency.
Show how to define alpha mode.
Tutorial7
Draw a scene using 2 dynamic lights.
Show how to create dynamic lights, and how to change lightening mode.
Tutorial8

Draw a scene with animated water surface.
Show how to dynamically deform a mesh.
Tutorial9

Show use of MiniGL functions.
Top Cube use GL_QUADS, Bottom cube use GL_TRIANGLES, and 3rd cube use Vertex array.
Tutorial10

Display a Quake3 scene.
Show how to:
- Display a Quake like scene.
- Create a 1st person camera
- Define
fixed lights (different of dynamic lights)
- Create lightening effects
-
Create a BSP.
- Draw with BSP.
Tutorial11

Display animated character.
The program use a native Half-Life model file (.mdl). The demo use fixed point quaternions to animate character.
Tutorial12

Show use of collisions in fixed point.
The ball 1 is physically controlled, and can be impulsed with arrow keys.
To import data in renderer you need 2 files
- a xxxxx.P3d file
containing geometrie
- a xxxxx.Tex file containing textures
a/ Create your scene/objects with 3dsmax.
Take care that object sizes are
not too small. Because renderer use only integers, vertex coordinate will be
converted to integer. In the Data directory you will find 3dsmax example showing
valid dimentions.
b/ Always do a 'reset xform' on objects scaled or rotated. Geometric transformations defined in object matrix, except position, are not exported.
c/ - Define Vertex color for every objects. If not defined, export will define default vertex color values to white.
e/ - Export you scene in text ASE format. The ASE export options are shown in following picture.

f/ Use the 'ExportPGL.exe'. (Dos program)
This program read xxx.ASE file and create 2 files
xxxxxx.P3d
xxxxxx.Tex
This files can be imported directly in renderer (refer to C++
code examples)
See the following picture for Program command line. It take
lem.ASE file, and create lem.P3d and Lem.Tex files.
Source code of this program is included in full version.

Do not disable faces culling (activated by default), this allow to draw only faces oriented to camera. (disable culling only for dual sided faces).
Use Bsp if scene is big and lot of the scene is out of the field of view.
Activate perspective correction only if required. Generaly it is necessary only if faces are very near of the camera. (Quake scene). For mario style camera (Ex: Ghost World), perspective correction is not required. Refer to tutorial 10 to see how to set perspective correction activation level (auto mode).
For mobile objects, check if bounding box is visible before to try to display it.
In full version :
- All sources are is included (C and C++). Allow
to modify rendering parameters , and to customize it depending of
application.
- ExportPGL
program source code.
- Royalties free for commercial
application.
In demo version :
- Only tutorials exe files
A message forum is active here :
http://pub41.ezboard.com/fsundialsoftpocketpcfrm1
For bug report, or questions, email to pierrel5@free.fr